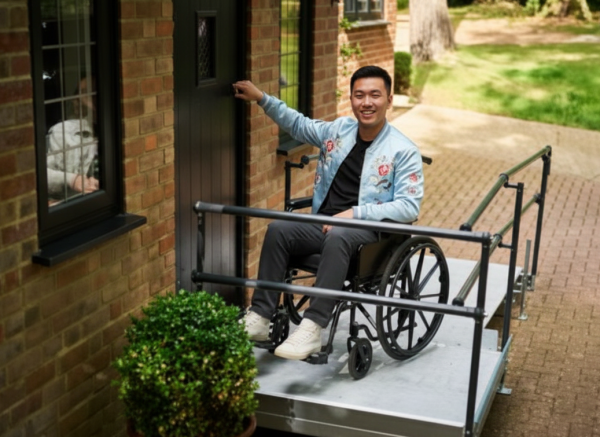
Whether you’re a seasoned pro or new to installing, we’ve created step-by-step instructions for installing your Welcome Modular Ramp – the go-to solution for safe and easy access.
The installation is broken down into 3 phases:
- Platform Assembly
- Ramp Assembly
- Handrail Assembly
The scenario we have demonstrated in this video is a very common one, however if you have any questions during your installation, please get in touch with our team.
Why Welcome Modular Ramps?
- Quick & easy for you to install
- Safe & reliable access
- Configurable to suit different access needs
- British-made for quality you can trust
Phase One - Platform Assembly
Preparation
- Assemble the ramp platform and legs, including the foot bolts. All bolts should be hand-tightened initially
- Lay the 4 platform sides out, so you can see how the corners meet
- Then assemble using the wing nuts and bolts provided.
Platform
- Attach the platform tops. You will notice that they don’t go to the edges of the platform sides.
- Before the platform tops are fully tightened, slot the legs through the square holes in each corner of the platform.
- Make sure that at least 2 of the leg holes are protruding 1.5cm above the platform surface, as these will be needed for fixing the handrail uprights.
- Measure from the head of the foot bolt to the top of the platform.
- Once the leg and platform holes are lined up as close to the measurement required, put two bolts through the leg, fixing it to the platform. Only hand-tighten at this point.
- Attach the platform spine
- Position the kerbs, depending on the ramp configuration
- Attach the full-length kerbs
- Attach the infill kerbs on each side of where the ramp joins the platform and either side of where the doorplate will connect to the platform.
- Attach the ramp to the platform joiner, making sure it’s the correct way around.
Door plate
- If no self-supporting kit is needed, the doorplate attaches the same way as the ramp joiner. Again, make sure this is attached the correct way around.
- For a self-supporting doorplate, follow this demonstration in the video at X seconds.
Final adjustments
- Fully tighten ALL nuts on the underside of the platform except the legs, but make sure to avoid overtightening.
- Move the platform into position.
- Adjust each leg until the correct height is achieved and the platform is level in all directions. We recommend using a 60cm spirit level at this stage.
- Fully tighten the platform legs.
Phase Two - Ramp Assembly
- Join the first section of the ramp to the platform and ramp joiner
- Once the first section of the ramp is joined to the platform, attach the ramp join spine and fully tighten.
- Attach the two legs to the join spine, halfway up the ramp. Only hand-tighten at this point.
- Now attach the second ramp section and hand-tighten all the nuts and bolts.
- Add the join spine to the bottom of the furthest ramp section, attach the legs, and hand-tighten. Repeat this process until the ramp section is complete.
- If the bottom ramp section is 4ft long, there are pre-made fixing holes to attach the last join spine halfway down the ramp section.
- Now that the ramp is attached, adjust all the legs to ensure the ramp is straight, and landing evenly on the ground.
- Tighten all the nuts and bolts for the legs and join spines, starting from the top of the ramp.
Phase Three - Handrail Assembly
Handrail Kits
- Kit 34 – Top rail on the ramp sections
- Kit 38 – Mid rail on the ramp sections
- Kit 44 – Top rail on platforms
- Kit 48 – Mid rail on platforms
Handrail Uprights
There are 2 handrail upright sizes. The taller size is for the platform, and the shorter size is for along the ramp. With any ramp length over 240cm, the first leg or legs down the ramp will not need a handrail upright.
- Slot the taller uprights over the protruding leg ends of the platform, the round holes should be facing inside the platform.
- You may need to lift the handrail upright until the 5.5cm M8 bolt can be pushed through. Two bolts will be required to secure the bottom of all handrail uprights.
- Repeat the process with all the handrail uprights
- Once all the handrail uprights are on and tightened, add all the end bungs for the uprights and remaining exposed legs.
Handrail
- Ramp handrails are dependent on the ramp length, however, if the ramp is over 240cm, the 120cm handrail lengths should always be put at the top of the ramp.
- Join the handrail tubes together, making sure the joins are inside the handrail brackets. They shouldn’t be on show.
- Join the bow end to the double handrail using the adjuster collar, ensuring both tubes are pushed fully into the collar.
- Secure the bow-end to the handrails using two self-tapper screws per bow-end. The self-tapper screws should always be on the underside of the handrails.
- Once the handrails and bow-ends are all on and in the correct position, tighten the fixings and add the dome nuts to the bolt ends.
- If you are fixing down the ramp, you are now ready to fix the feet to the ground.

Your Welcome Ramp is now ready to use!
Our Welcome ramps are highly configurable, so they can be adapted for each individual building.
While our Welcome ramps are extremely flexible, every installation is different. The scenario we have demonstrated in this video is a very common one, however if you have any questions during your installation, please do get in touch with our team.
T: 020 8275 0375